
1. Three Methods to Schedule an Appointment
a. On-Demand Appointment: Ideal for urgent consultations; schedule it with available doctors for immediate assistance.
b. Scheduled Appointment: Perfect for non-urgent consultations planned for a future date. If doctor has available time, you can schedule the appointment for the same day.

3. Scheduled Appointment Procedure
Typically, select “Local Appointment Type.”

2. Visit Type: Opt for “First Visit” or “Follow-up Visit.”
Note: Follow-up visits should be with the previously consulted doctor. If you’ve never seen this doctor before, choose “first visit”. If you’ve seen them once before, choose “follow up visit”.

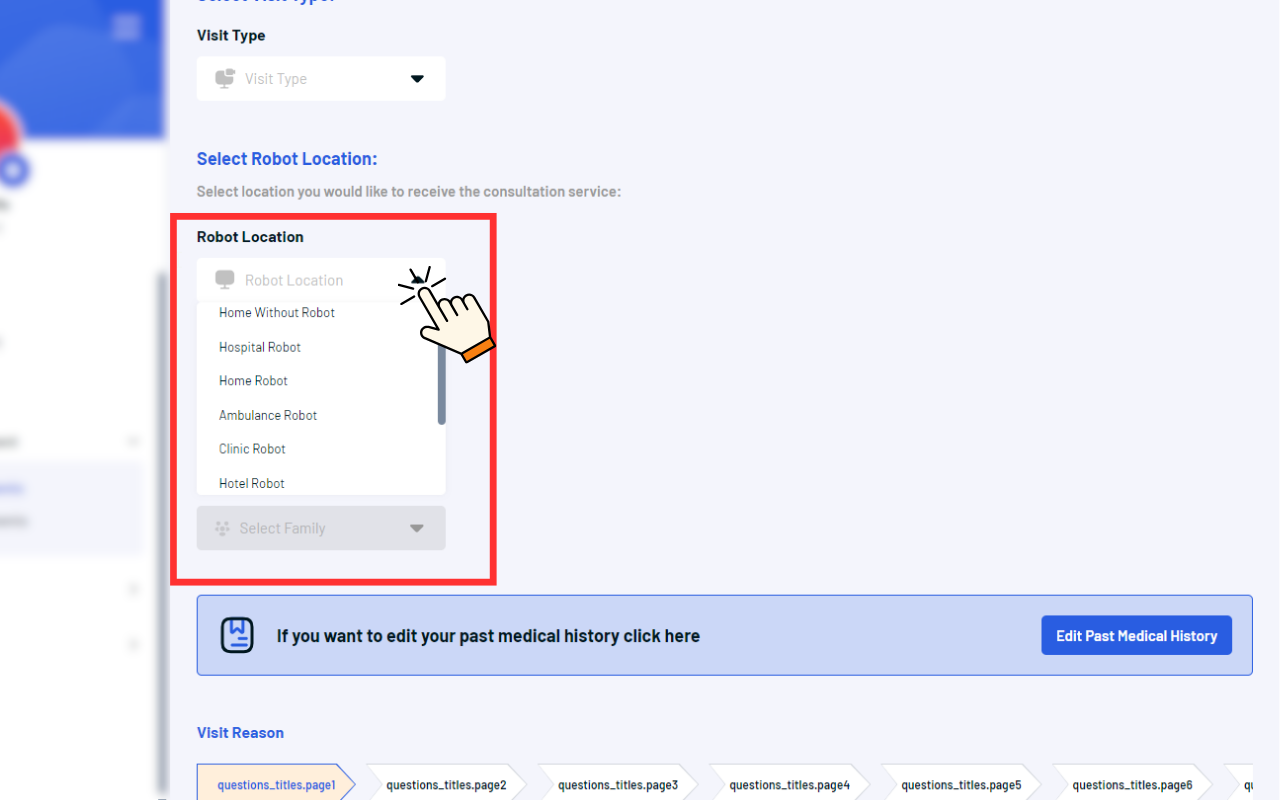
3. Robot Type:
Please choose the appropriate robot option for your video consultation from the options listed below:
a. “Home Robot”: Opt for this choice if you have a home robot kit and wish to utilize it to facilitate your consultation with the doctor from the comfort of your home.
b. “Hospital Robot”: If you prefer to have your video consultation at the hospital utilizing their robot services, select this option. Please note that you will need to visit the hospital for this kind of consultation.
c. “Home Without Robot”: If you do not have a home robot kit but still prefer to have your consultation from home, choose this option.
5. Purpose:
Elaborately describe the purpose in up to 9 steps, providing a detailed context.


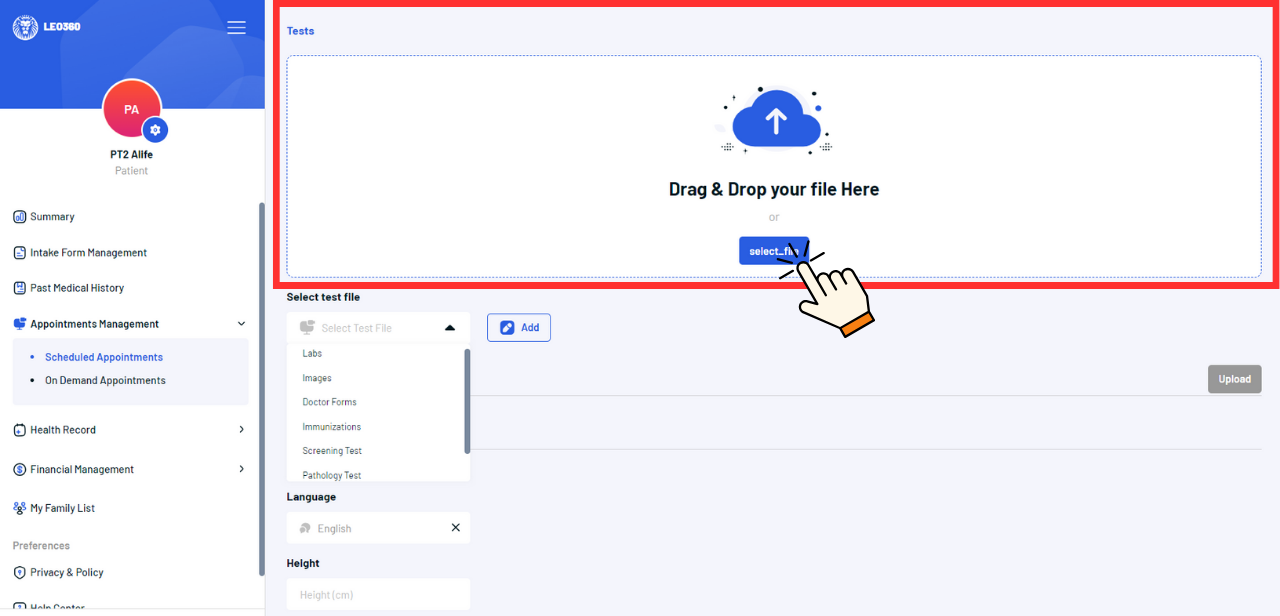
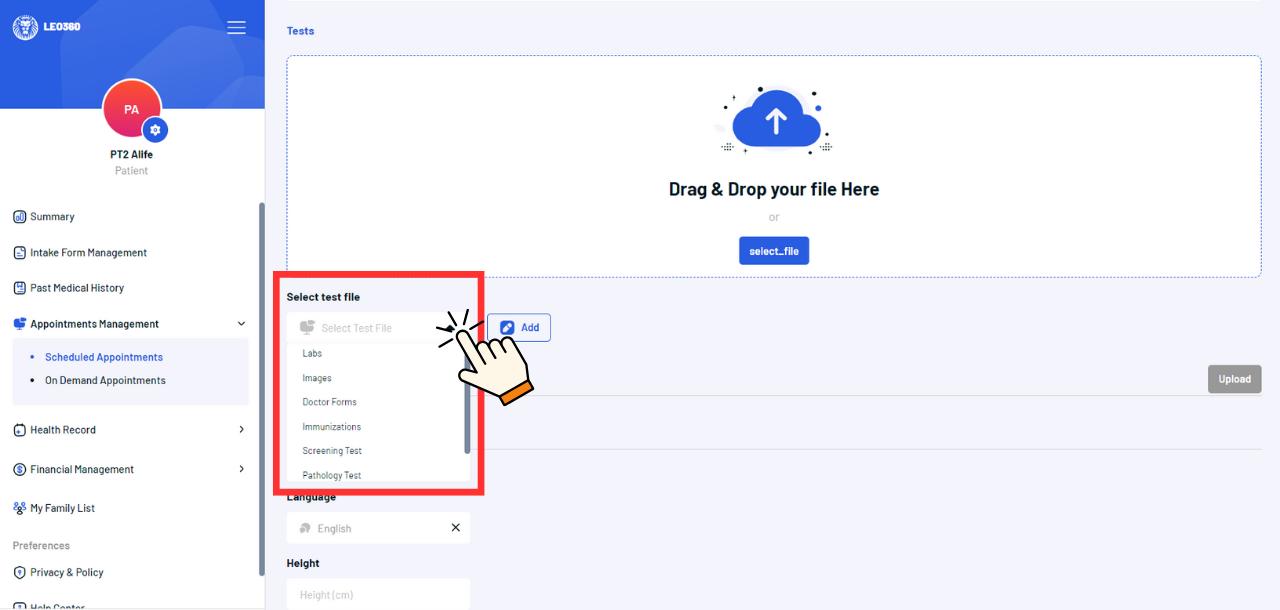
6. Test Files:
Improve your assessment by providing any requisite files and specifying the type of test. Follow the steps below to upload your files:
a. Choose the kind of file you wish to upload from the available options. b. Add the file using the “Add File” option or simply drag and drop the file into the designated area. c. Click on the “Add” button to attach the file. d. Press the “Upload” button to successfully upload your selected file.
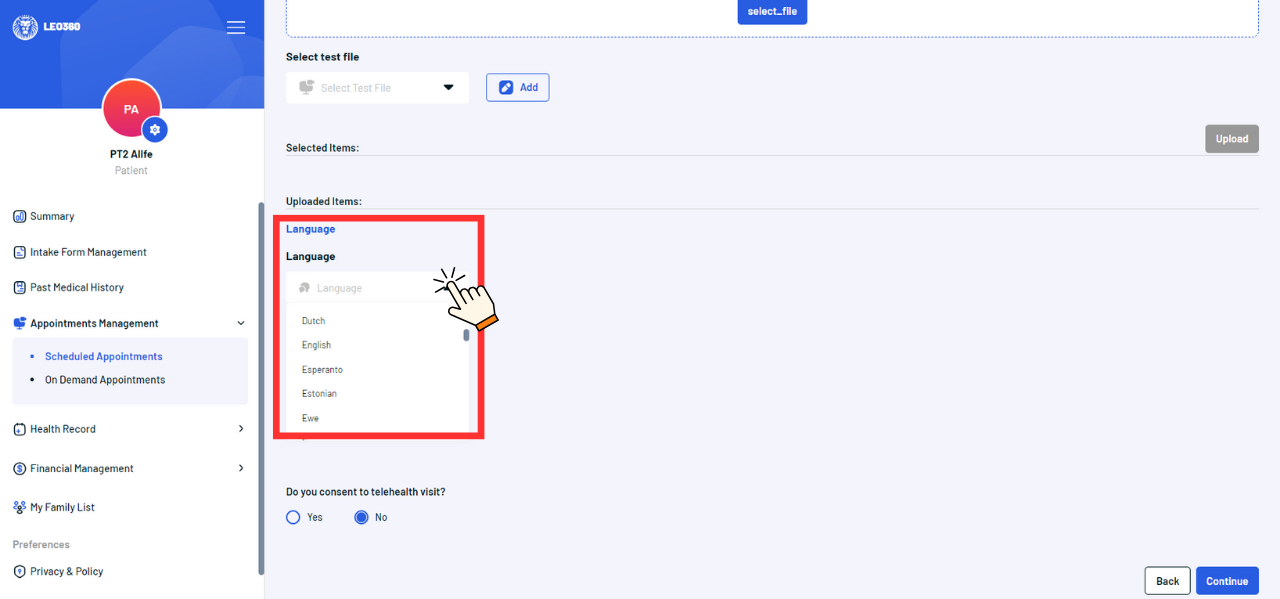
7. Language Preferences:
Select your preferred language from the dropdown menu to facilitate smooth communication.
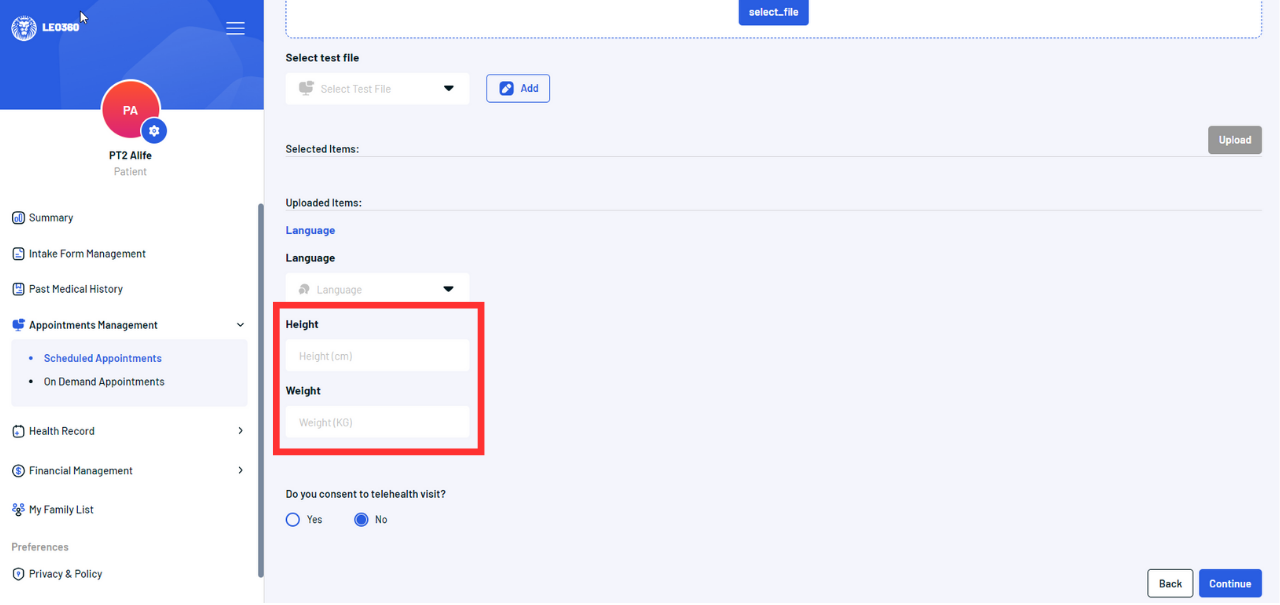
8. Health Data:
Update your current height and weight for a holistic health overview.
9. Consent:
Make sure that you choose “Yes” to proceed with your video visit.

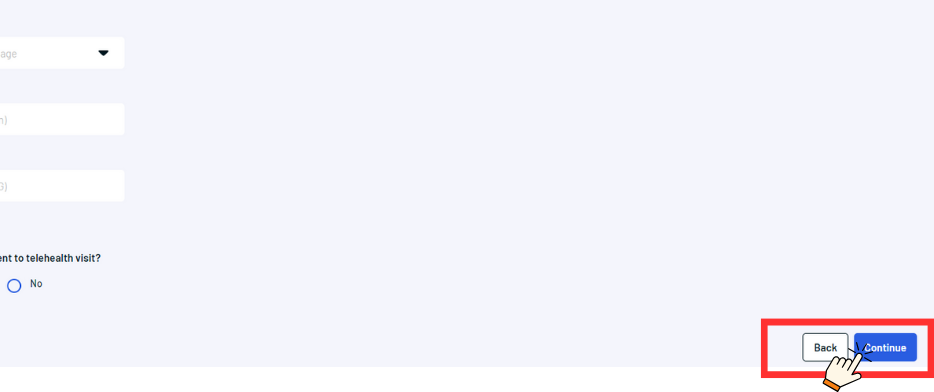
10. Finalization
After adjusting all options, click “Save Change” at the bottom right, followed by “Approve” in the confirmation pop-up to secure the changes.

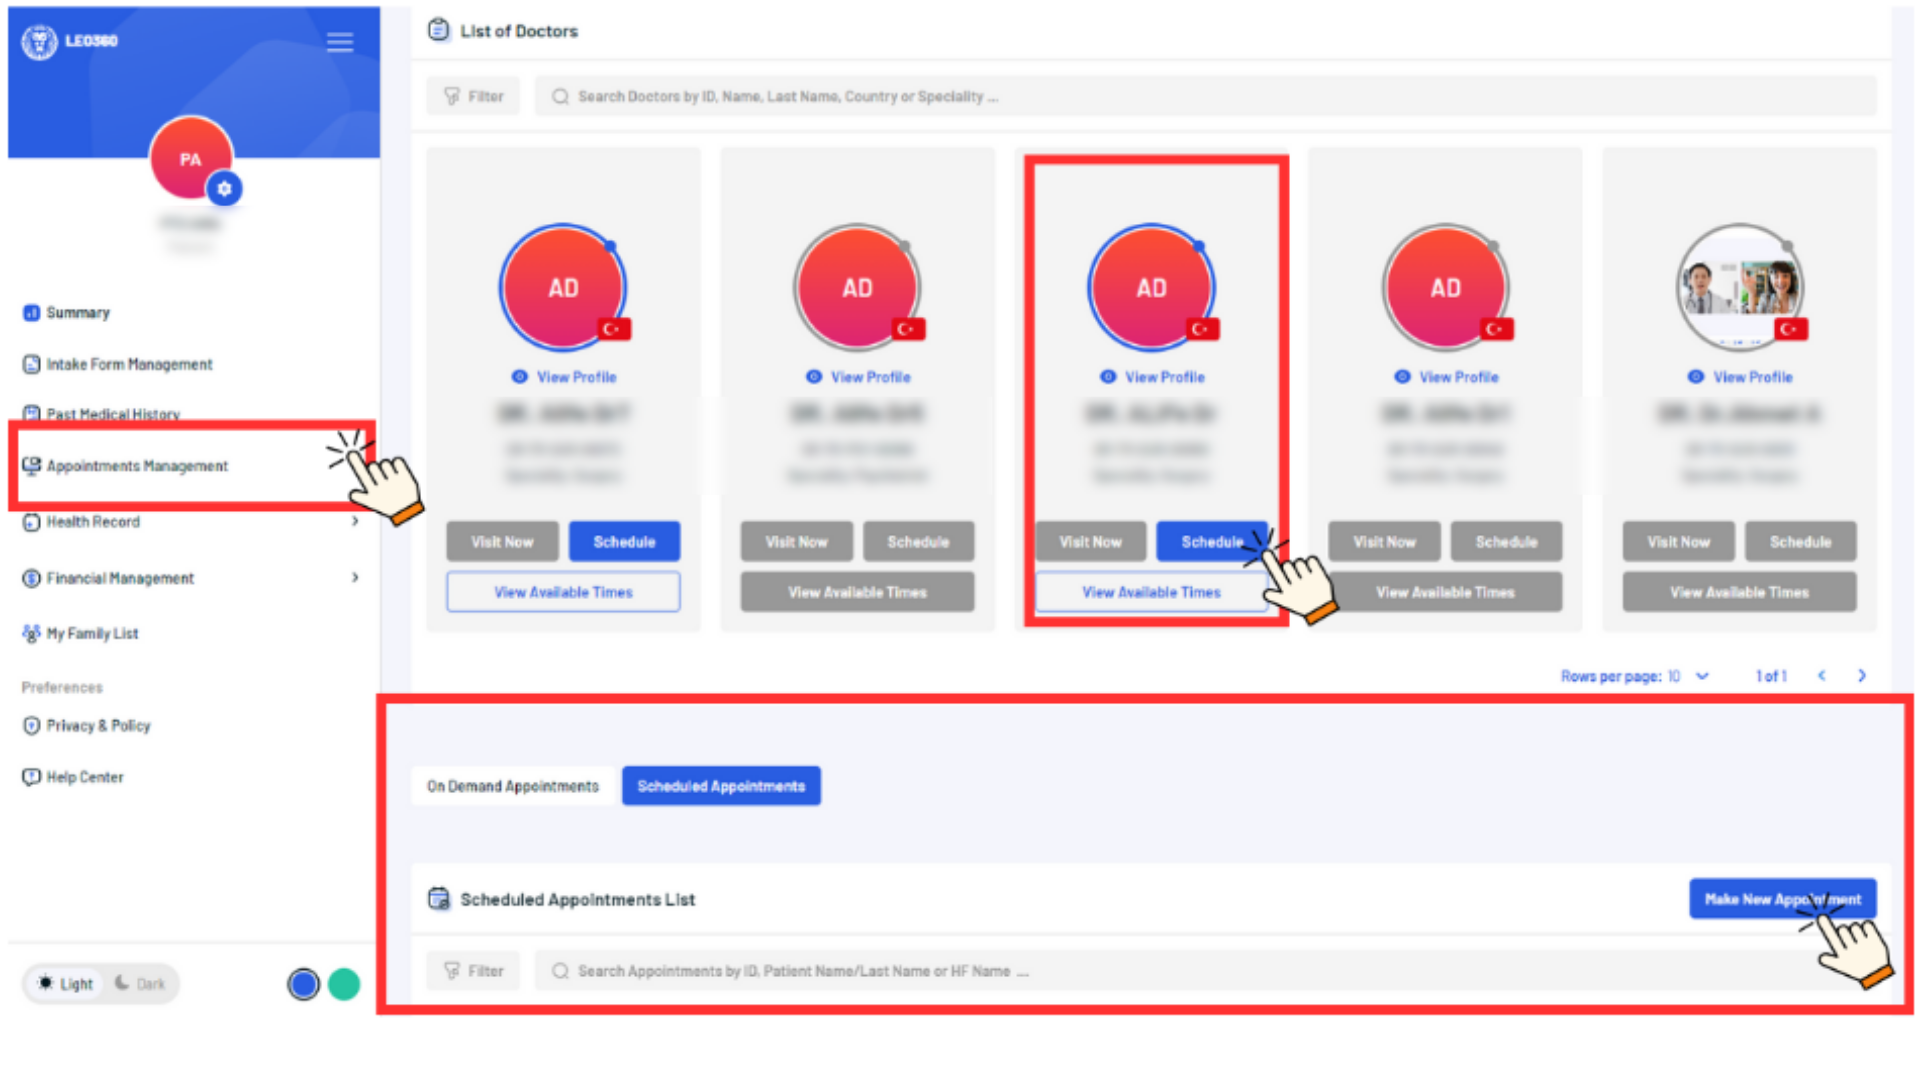
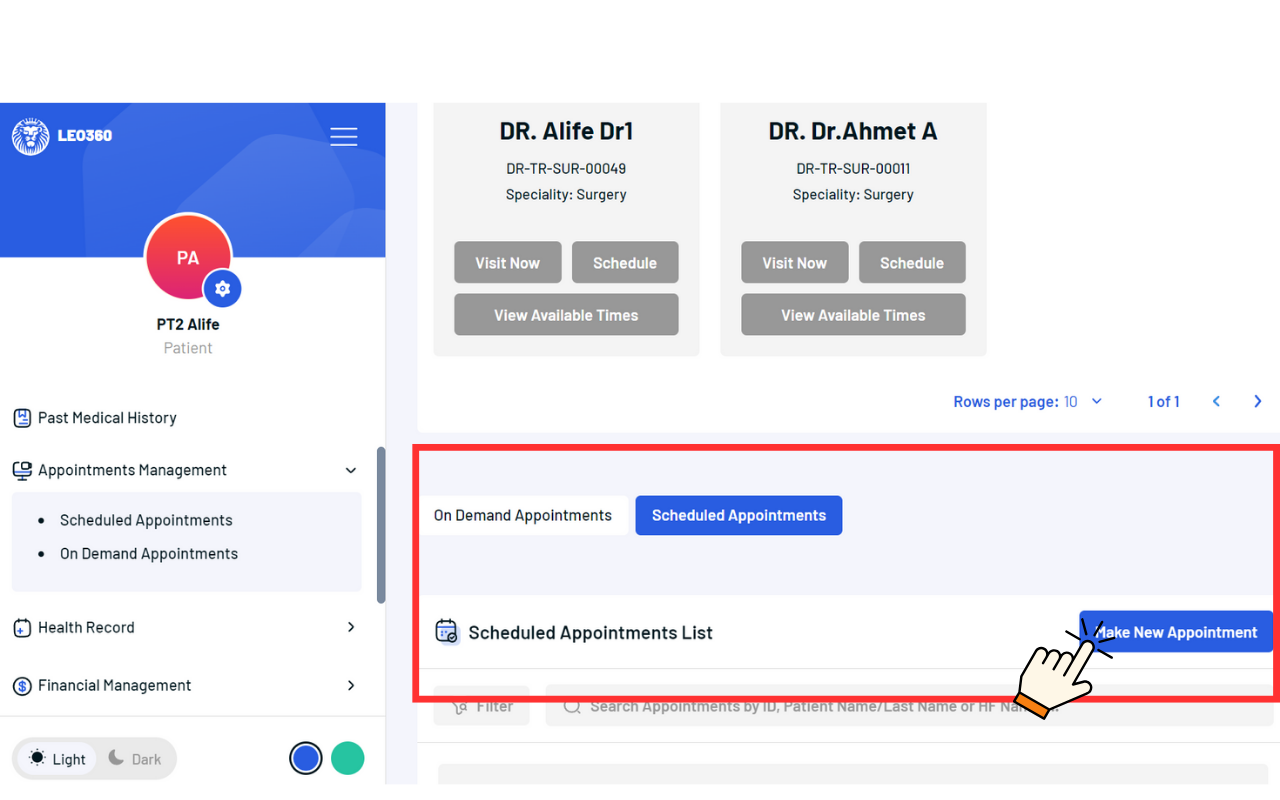
2. Profile Review: Click on a doctor’s profile for comprehensive information and choose wisely based on your preferences and needs.  3. Scheduling: Click “Schedule” after choosing a doctor. Patients can only schedule appointments with doctors when the “Schedule” button is blue and active. A grey button indicates that the doctor has no available time for visits.
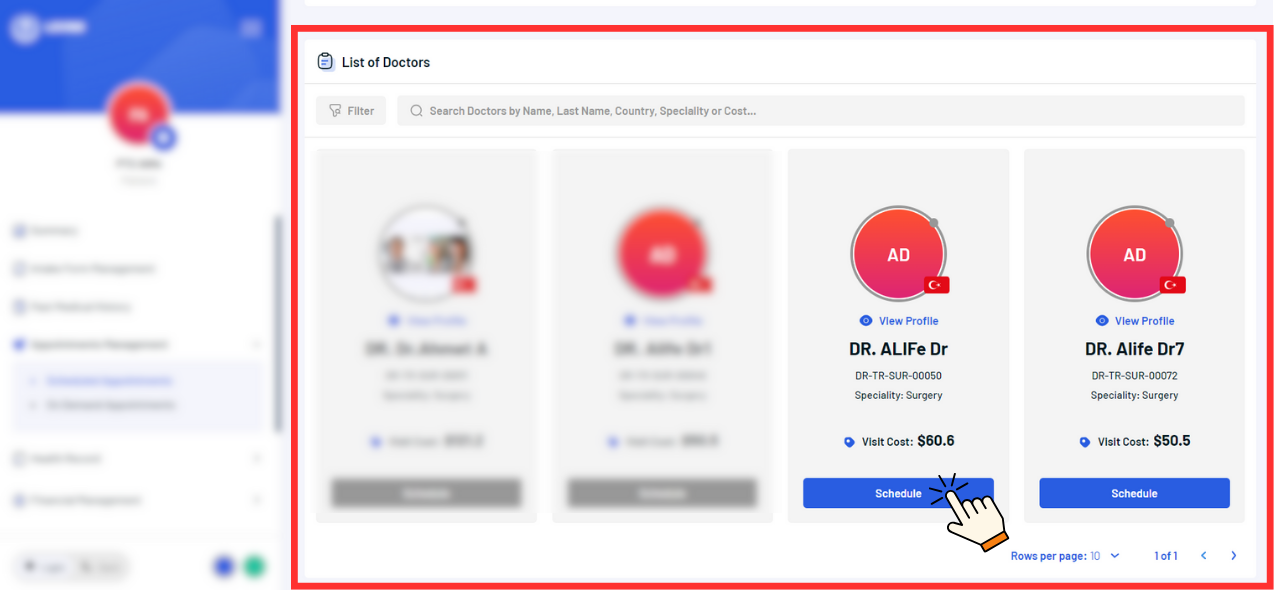
4. Appointment Date and Time:
a. Calendar View: Find and select the preferred date and time, considering the doctor’s available slots.
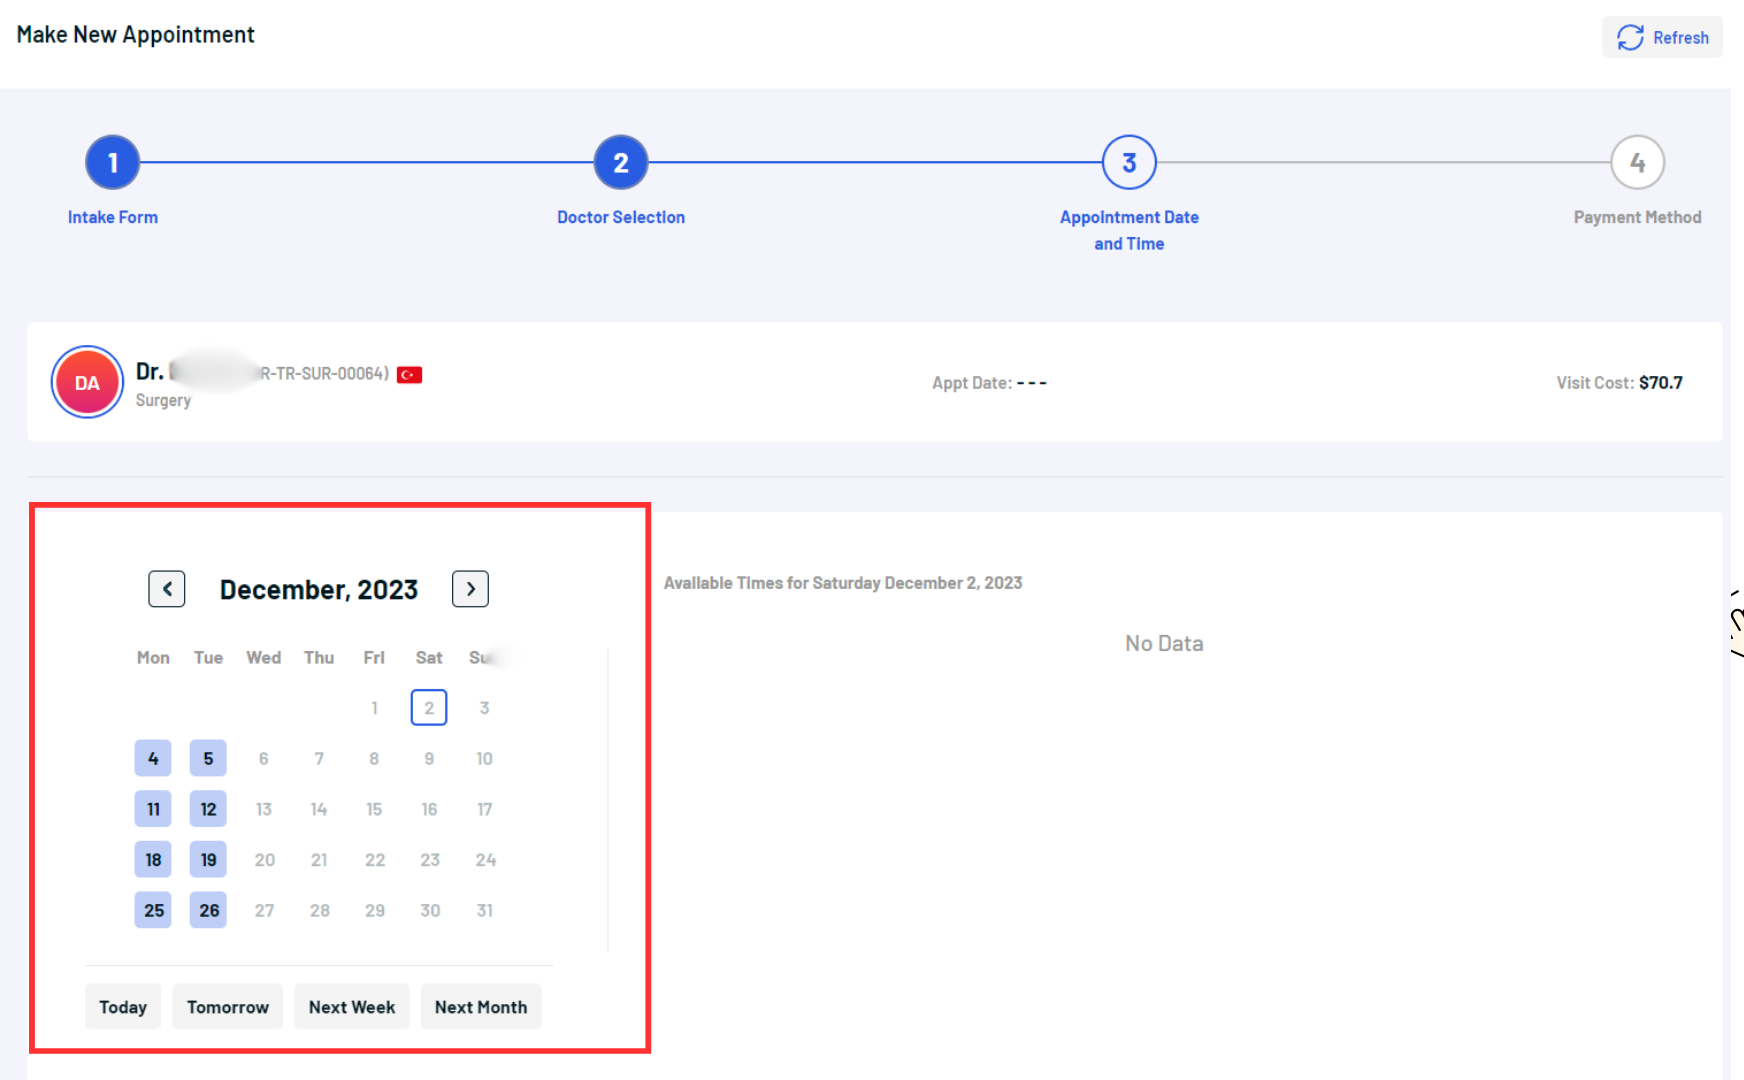
b. Time Selection: Choose a time slot that is convenient for you.

5. Payment Method:
a. Options: Choose from a credit card, PayPal, or wallet for payment.
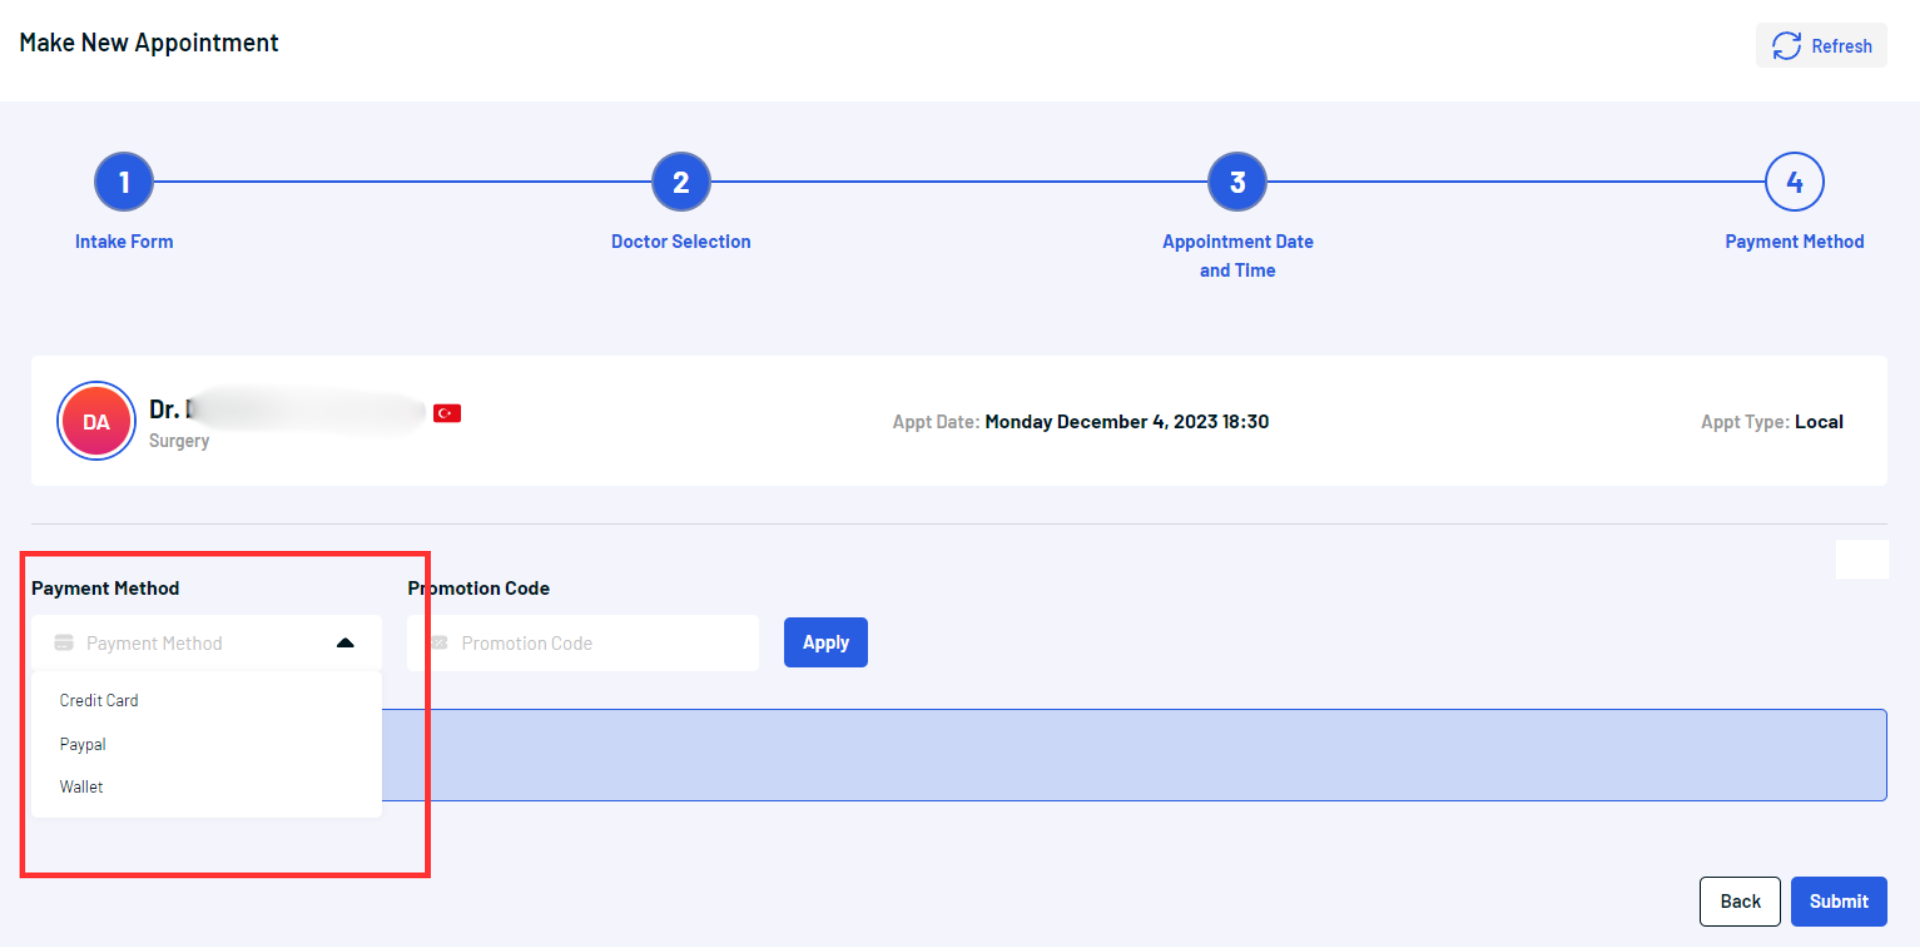
b. Promotion Code: Apply a promo code if one is available.
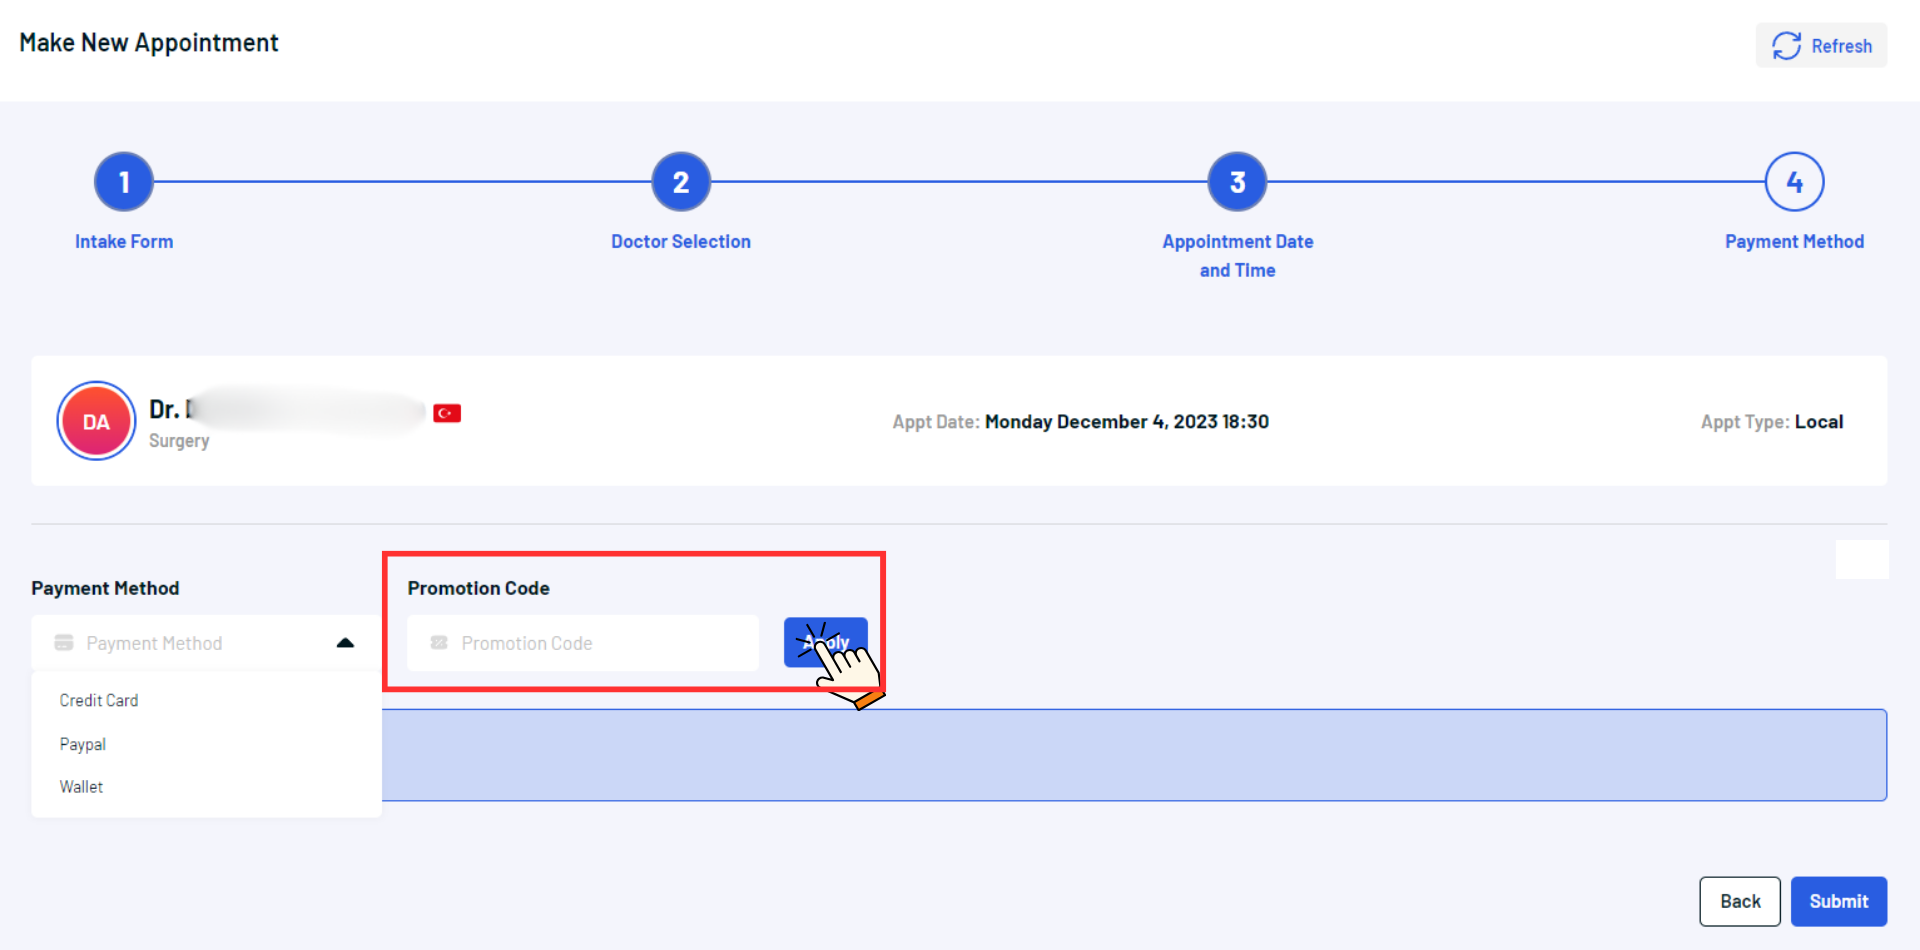
c. Submission: Click “Submit” to finalize.

